What a point cloud is
and what you do with it
A point cloud is the set of millions of points — each with its X, Y, Z coordinates — that a 3D laser scanner measures on a real installation. Together they form a metric, three-dimensional replica of what exists: you can orbit around it, measure distances and check dimensions on it, like a three-dimensional photograph of the plant exactly as it is built today.
In this guide: how it is captured, its formats and how to work with it in each piece of software ↓
How a point cloud is captured: 3D laser scanning and LiDAR
A point cloud is not drawn: it is measured. And it is measured with a laser, the same technology behind two terms that are constantly mixed up — 3D laser scanning and LiDAR — but which solve different problems.
The principle is simple: a laser beam leaves the device, bounces off a surface and returns. By measuring the time it takes — or the phase shift of the signal — the distance to that point is calculated. The scanner repeats that measurement hundreds of thousands of times per second as it sweeps the environment, and that is where the millions of points that make up the point cloud come from. It is, literally, a 3D survey of the real condition, measured point by point.
-
Terrestrial laser scanner Fixed stations
The scanner is placed on a tripod at a position (a “station”), rotates and measures everything around it. This is repeated at as many stations as needed to cover the area without leaving shadows, and the scans are then joined together. It gives the greatest density and fidelity in dense interiors: machine rooms, pipe racks, process plants.
-
LiDAR (LiDAR point cloud) In motion
It is the same laser measurement, but mounted on something that moves — a drone, a vehicle, a capture backpack. It covers large areas and exteriors much faster, at the cost of somewhat lower density. Ideal for terrain, roofs, roads or a whole site; less suited to the fine detail of a room full of equipment.
A point cloud is captured by measuring with a laser: the terrestrial scanner does it from fixed stations for interior detail, and LiDAR mounts that same laser in motion — drone, vehicle, backpack — to cover large areas.
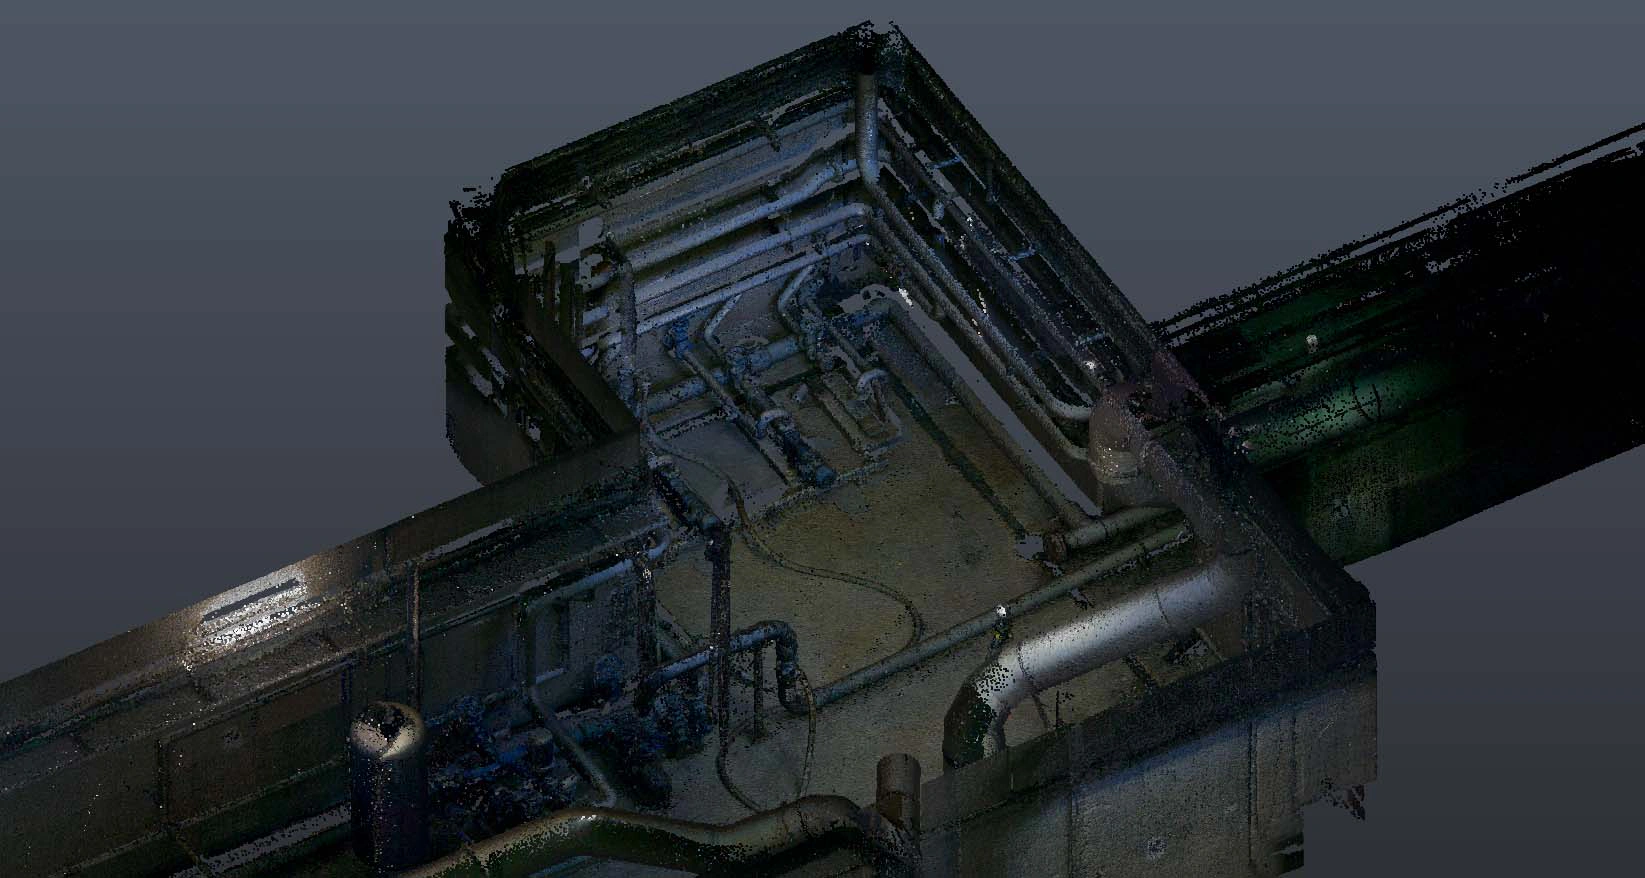
In an industrial plant, the usual choice is the terrestrial laser scanner from fixed stations, because the density of equipment and pipework requires measuring in detail and from many angles so that no areas are hidden. A3D scans this way, with production running, planning the routes with the plant team.
Point cloud formats: E57, RCP/RCS, LAS/LAZ and PTS
A 3D point cloud can be saved in several formats, and each one serves a purpose. These are the ones you will see in practice, explained plainly.
-
E57 .e57
The open standard for exchange. It stores geometry, colour and intensity, and almost any program reads it. It is the format to always ask for, because it leaves you free: with an E57 you can take your point cloud to other software or another supplier whenever you wish, with complete autonomy.
-
RCP / RCS .rcp · .rcs
The Autodesk ReCap format. The .rcp is the project and the .rcs files are the scans it groups. It is the one Revit, AutoCAD and Civil 3D read natively, so it is the working format when you model on an Autodesk platform.
-
LAS / LAZ .las · .laz
The surveying and LiDAR standard. Widely used in drone and terrain capture. The .laz is exactly the same data compressed, so that a huge file takes up a fraction of the space and moves more easily. Common in Civil 3D and in mapping workflows.
-
PTS / XYZ .pts · .xyz
Plain text, simple but heavy. Each line is a point with its coordinates (and sometimes colour). It opens in almost everything and is easy to inspect, but being neither compressed nor structured, it takes up a lot of space and runs slowly. Useful as a fallback or basic exchange format.
Always ask for your point cloud in an open format such as E57 as well as the working format: it is what guarantees that the data is yours and portable to any software, today and in ten years’ time.
What accuracy to expect from a point cloud in an industrial environment
“How accurate?” is the first question an engineer asks, and it is easy to make a misleading comparison if two numbers that do not measure the same thing get mixed up.
A scanner manufacturer publishes an instrument accuracy: what the device achieves measuring an isolated point under ideal laboratory conditions, in the order of one or two millimetres. It is a real figure, but it is not the one you use to intervene in your plant.
What really counts is deliverable accuracy: how far the final point cloud deviates from the real, measured plant, once all the stations have been joined together. The whole process comes into play here — scan registration, stitching between floors, the tolerances of the construction itself — and that figure is considerably larger than the catalogue one. It is the one you use to decide whether a new piece of equipment fits through an opening or whether a pipe passes where you think it does.
For an industrial environment, the honest approach is for a supplier to state the accuracy of its deliverable in writing, not that of its device. At A3D we set it at project level and put it in writing; you will find the detail, with the specific figure, on the 3D laser scanning page.
With a point cloud, two things must be kept apart: instrument accuracy (the catalogue figure, on an ideal point) and deliverable accuracy (how closely the final point cloud matches the real plant). The one that counts for intervening is deliverable accuracy, and it is the one to require in writing.
How to load a point cloud into Revit (via ReCap)
Revit does not read the raw point cloud: it goes through ReCap first. Once imported, it becomes your exact three-dimensional template to model on.
You need Autodesk ReCap (Autodesk’s point cloud converter) and your point cloud in a format ReCap understands — E57, LAS, PTS…
- In ReCap, create a new project and import your point cloud (E57/LAS/PTS). ReCap indexes it and generates an .rcp project with its .rcs files, one per scan.
- In Revit, go to the Insert → Point Cloud tab and select that .rcp.
- Choose the positioning: Auto – By Shared Coordinates if the point cloud is georeferenced, or by origin if you work in project coordinates.
- Isolate the area with the section box and work by views and sections: this way you do not load the whole point cloud at once and you can see clearly what you are about to model.
- Model each element — walls, pipes, equipment — using the point cloud as an exact reference.
To be honest: Revit does not turn the point cloud into intelligent geometry by itself. The point cloud is the visual guide; the model is built by hand, element by element. That reconstruction work is precisely as-built modelling.
How to insert a point cloud into AutoCAD
In AutoCAD the route is the same as in Revit — it goes through ReCap — with the command for attaching the point cloud and the clipping tools to isolate the part you need.
- Convert your point cloud to .rcp/.rcs with ReCap, as for Revit.
- In AutoCAD, use Insert → Attach Point Cloud (command POINTCLOUDATTACH) and select the .rcp.
- Define the insertion point, scale and rotation. Tick “use geolocation” if the point cloud is georeferenced.
- With the point cloud attached, draw in 2D or 3D taking references from it; use point cloud cropping (boundary or section) to keep only the part you are drawing.
What it is useful for: ideal for producing plans, elevations and 2D sections faithful to the real condition. For a model with data per element, the natural destination is Revit or a BIM workflow.
The point cloud in Civil 3D
Civil 3D is AutoCAD with terrain and infrastructure tools: the point cloud comes in the same way, but here it is of most interest for extracting surfaces and topography.
- Attach the point cloud as in AutoCAD (.rcp via ReCap), or import .las/.laz directly if you come from LiDAR.
- Set the drawing’s coordinate system (the project’s UTM) before anything else, so that everything matches the mapping.
- Extract a TIN surface from the terrain points (or from a filtered point file).
- On that surface, generate contours, profiles and grading: it is the typical workflow for site development, roads and earthworks.
When to choose it: when what you are digitising is terrain, roads or the open ground of a site. For the interior of a process building, the workflow is terrestrial scanner → Revit.
The point cloud in ArchiCAD and SketchUp
Point clouds are also used outside the Autodesk ecosystem, with nuances worth knowing before choosing a workflow.
ArchiCAD imports point clouds (for example from E57 or XYZ) and places them as a point cloud element that serves as a template for building the model. The approach is the same as in Revit: the point cloud is the reference and the model is built on top of it.
SketchUp does not handle dense point clouds natively with ease; it relies on specialised extensions — such as Scan Essentials (Trimble) or similar — to load the point cloud, reference it and trace geometry over it. It works well for volumes and simple architecture; for the detail of a process plant it falls short compared with a BIM workflow.
The practical conclusion: almost any design program can use a point cloud as a template, but none of them turns it into a model with information on its own. That step always comes from modelling.
From the point cloud to the BIM model
The point cloud is a useful deliverable from day one for measuring and verifying. But as a working document it falls short, and it is worth knowing why before commissioning a scan.
A point cloud is millions of raw points. It does not know that a group of points is a pipe of a specific diameter, it cannot be isolated by system, it is not edited as geometry and it is very heavy. It is for looking and measuring, not for working on as if it were a project.
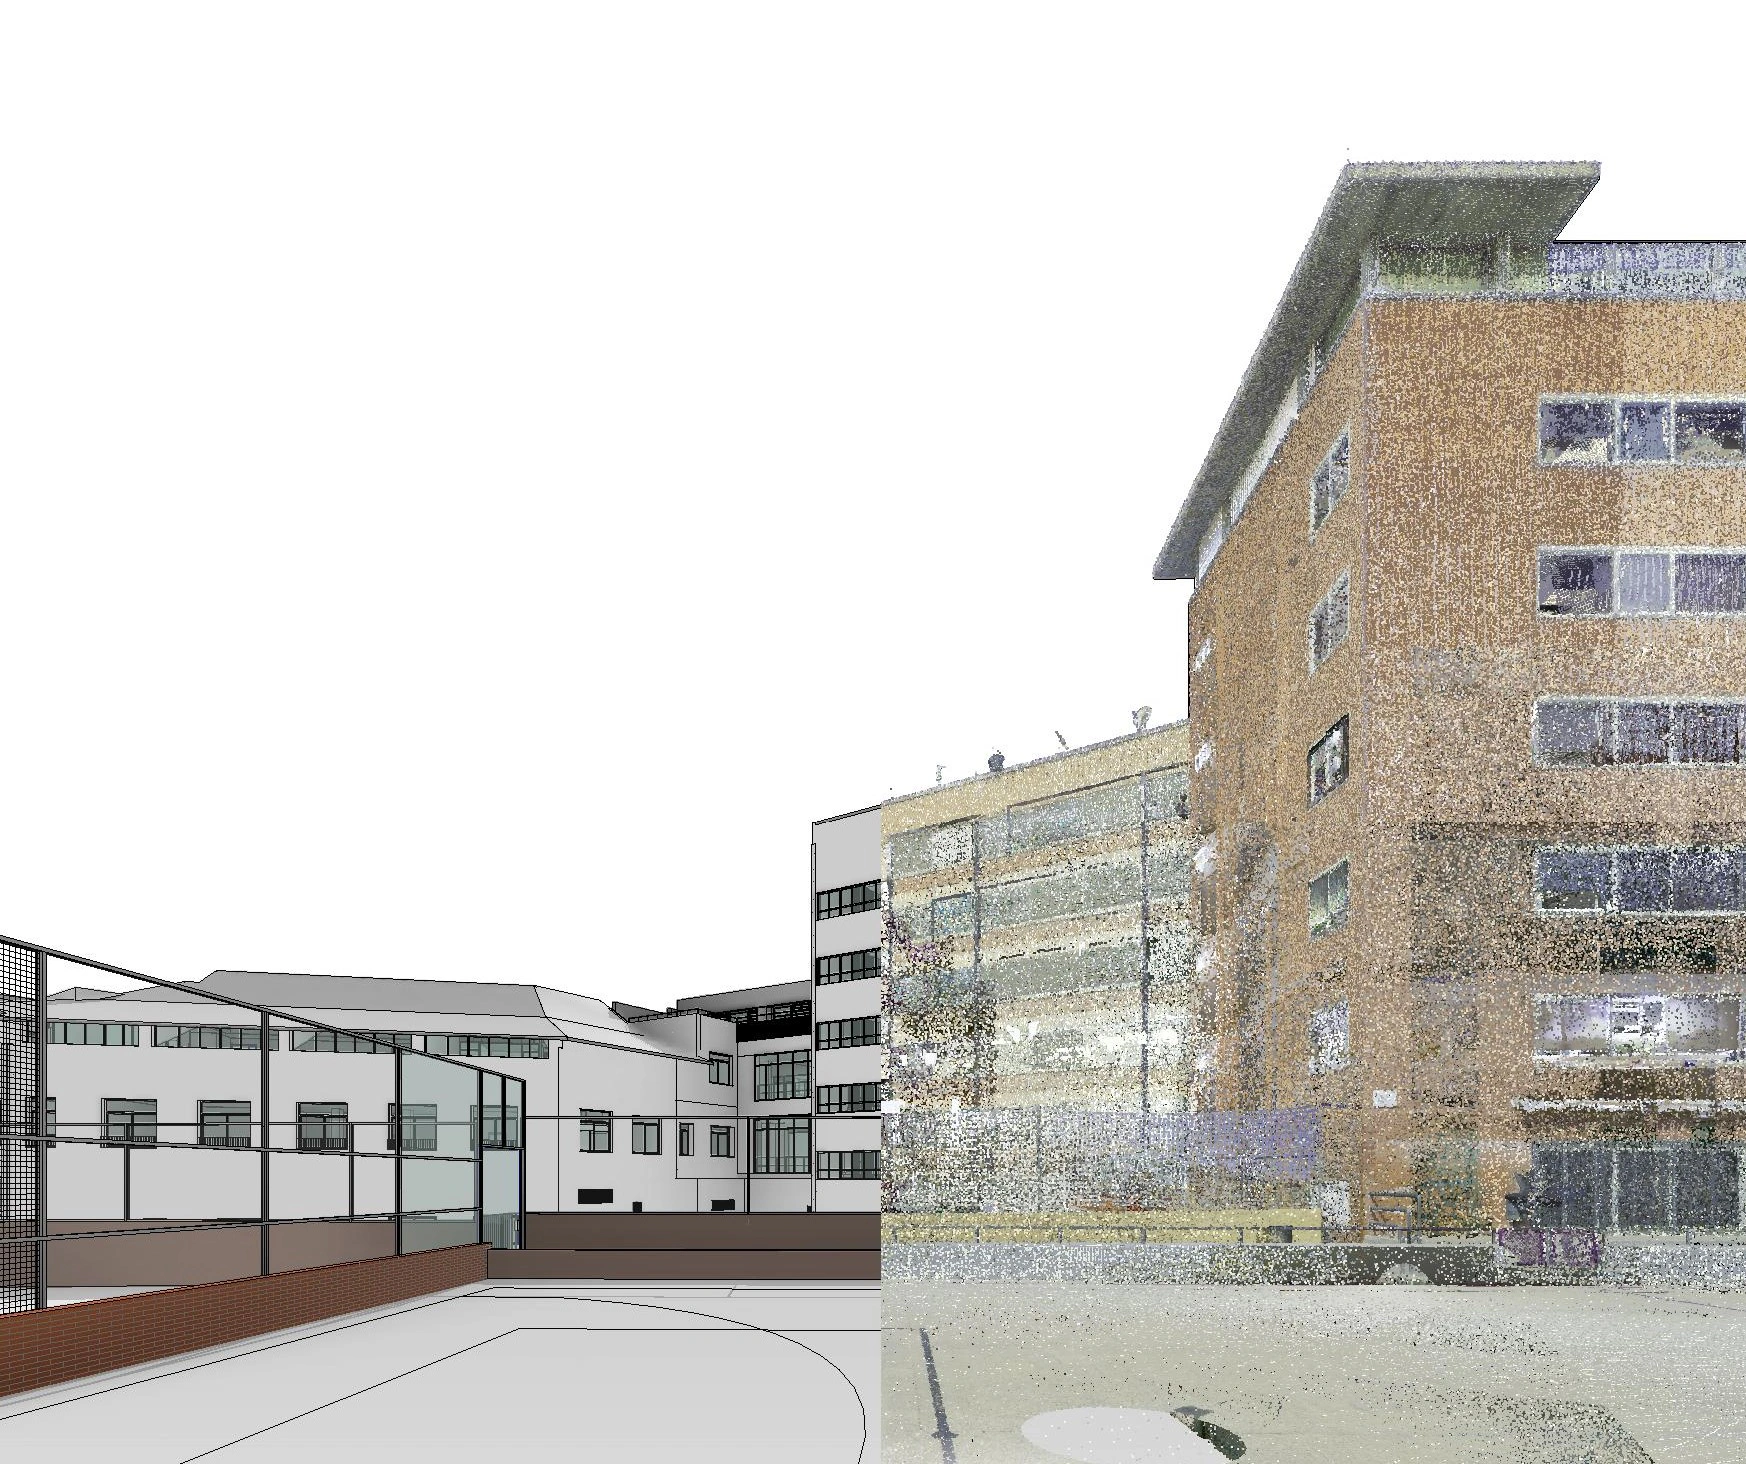
The deliverable that really pays off is the as-built BIM model rebuilt on the point cloud: each element — a wall, a valve, a piece of equipment — becomes an object with its data (material, diameter, specifications). That model can be queried, measured by system and edited, and it is the basis on which works are planned, equipment is replaced or a tender is issued with everything anticipated. If the term BIM is unfamiliar, here is what BIM is explained in plain language.
The point cloud is the raw material — measurable, faithful, but without intelligence; the as-built BIM model rebuilt on it is the information: each element with its data, ready for decisions about the plant.
Typical mistakes when commissioning a point cloud scan
The mistakes that cost most are not in the field but in how the work is requested. These are the six to avoid.
- Asking to “scan everything at maximum detail” Without an objective, too much is captured and too much is paid for. Capture is driven by what you are going to intervene in: detail where you need it, context everywhere else.
- Comparing instrument accuracy with deliverable accuracy A catalogue “0.0X mm” and the real deviation of the final point cloud are not the same number. Ask each supplier for the accuracy of its deliverable, in writing.
- Expecting drawings when you have only asked for the point cloud The point cloud is not a drawing or a model: it is the measurement. The drawings and the BIM model are derived afterwards. Make clear in the brief which 2D and 3D deliverables you want to receive.
- Not fixing the coordinate system from the start If the point cloud is not georeferenced to the project system, matching it later with other work on the site costs twice as much. Agree it before the first scan.
- Accepting a proprietary, closed format Require your point cloud in an open format (E57) and the model in IFC, owned by you. The data is yours; you must be able to take it to any software or supplier.
- Ignoring the model’s level of detail Two “as-built” models can be at very different levels of detail (LOD). Ask the supplier to certify the LOD in writing, so you know exactly what you receive.
Frequently asked questions about point clouds
The full answers to the most common searches about “point cloud”, with the detail they deserve even though they are basic concepts.
What is a point cloud?
A point cloud is a set of millions of points, each with its X, Y, Z coordinates in space, which a 3D laser scanner measures on a real installation. Together they form a metric, three-dimensional replica of what exists: you can orbit around it, measure distances and check dimensions on it. Each point usually also carries a colour and a reflection intensity value, which is why a point cloud looks like a three-dimensional photograph of the plant exactly as it is built today.
How is a point cloud captured?
It is captured by measuring with a laser from several positions. The terrestrial 3D laser scanner is set up at a station, rotates and emits a beam that measures the distance to every surface around it, point by point; this is repeated at as many stations as needed to cover the area without shadows, and the scans are then joined together (registered). LiDAR is the same technology mounted on something that moves — a drone, a vehicle or a backpack — to cover large areas or exteriors. In an industrial plant, A3D scans from fixed stations while production keeps running.
What format is a point cloud delivered in?
The most common formats are E57 (open and interoperable, the standard for exchanging point clouds between programs), RCP and RCS (the Autodesk ReCap format, the one Revit, AutoCAD and Civil 3D read), LAS and its compressed version LAZ (common in LiDAR and surveying) and PTS or XYZ (plain text, simple but heavy). It is advisable to receive the point cloud in an open format such as E57 as well as the working format, so as not to be tied to a single piece of software.
How do you open a point cloud in Revit?
Revit does not read the raw point cloud: it is first converted to the Autodesk format with ReCap, which generates an .rcp project. Then, in Revit, you use Insert → Point Cloud and select that .rcp. The point cloud remains as a visual reference to model on: Revit does not turn it into walls or pipes automatically; each element is modelled by hand, using the point cloud as an exact three-dimensional template.
How accurate is a point cloud?
Two accuracies need to be distinguished. Instrument accuracy is the one scanner manufacturers publish — in the order of hundredths of a millimetre on an isolated point under ideal laboratory conditions — and it is not the one you use to intervene. The one that matters is deliverable accuracy: how far the final point cloud deviates from the real, measured plant, taking into account the whole registration process between stations. That is the one used to make decisions about the installation, and it is the one a serious supplier states in writing.
Is a point cloud enough on its own, or does it need to be modelled?
The point cloud is useful for measuring and verifying from day one, but it falls short as a working document: it is millions of points with no intelligence. It does not know that a group of points is a pipe of a specific diameter, it cannot be isolated by system or edited, and it is very heavy. To plan works or put them out to tender, the useful deliverable is the as-built BIM model rebuilt on the point cloud, where each element is an object with its data. The point cloud is the raw material; the model, the information.
A point cloud of your plant, and the model on top
If this is about a real installation you want to digitise, the concrete step is a 3D laser scan of the area you are going to intervene in: you receive the navigable, measurable point cloud and, on it, the as-built BIM model faithful to the plant. The first area starts from around €6,000 (estimated); the scope is fixed after a technical visit. The article informs; the scan does the work.
Want the price per area? See it under pricing, or review what BIM is if the model is what you still need to understand.